wifi.wavlink.com Login & Setup: Your Complete Guide to Wavlink Devices
Often, most users are concerned about enhancing their home wifi network’s range and signal quality. However, it does not have to be that complicated. Instead, with the Wavlink wifi routers, you can enjoy enhanced signals. To adjust the router settings and configure your device, you must know the wifi.wavlink.com setup procedure.
Consequently, this guide provides you with detailed insights regarding setting up your device through the wifi.wavlink.com web interface. Before that, you must perform the wifi.wavlink.com login to access the web configuration panel of your router. Further, this guide will walk you through the quick steps to configure your device hassle-free. Let’s get started!
How to Initiate the wifi.wavlink.com setup?
To begin the Wavlink router setup, it is essential to be ready with the necessary things. A systematic preparation and having all things at hand help in configuring your Wavlink wifi router in moments seamlessly. Mainly, you must have accurate login credentials, correct web/IP address, and a compatible device.
In addition, if you prefer a mobile application over the wifi.wavlink.com setup, then keep your device handy and updated with the latest version of the WavRouter app. You can easily get this app on your phone from the App Store and PlayStore. Most importantly, the user-friendly interface of the mobile app gives you more flexibility and control to navigate across the router settings. Before that, let’s walk through the wifi.wavlink.com login steps.
Logging into the wifi.wavlink.com
However, logging into your Wavlink router is the fundamental step to harness its full potential. Whether you use the wifi.wavlink.com login portal or the WavRouter app, you must log into your administrative panel to manage your networking device.
Moreover, knowing how to log into the Wavlink router ensures seamless access to your device’s settings to customize your network. Here is how to log into Wavlink router:
- First of all, power on your networking device.
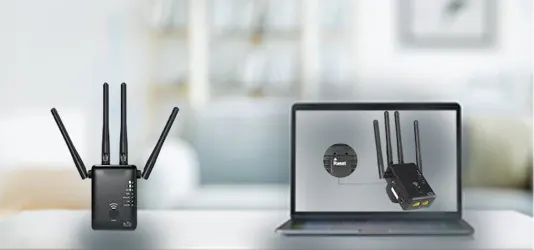
- Then, connect your computer through the Ethernet cable or router’s default SSID and password.
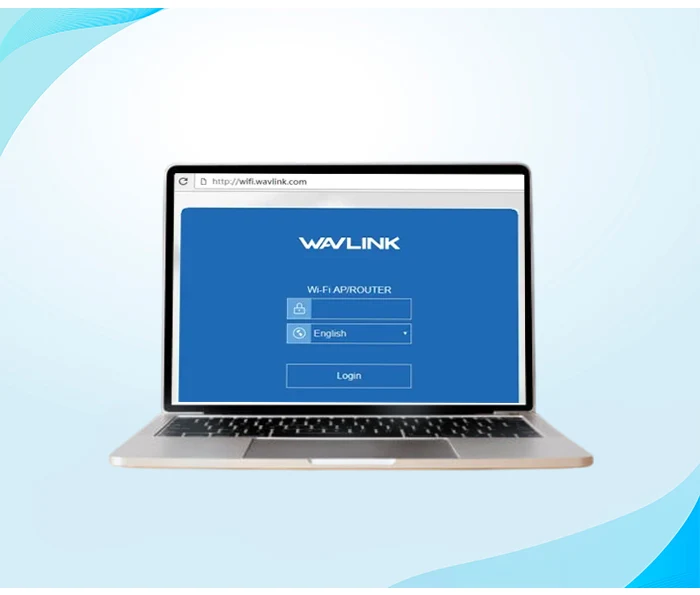
- Next, open any web browser and navigate to 192.168.10.1 IP or wifi.wavlink.com.
- Now, you will reach the login panel of the Wavlink router.
- Enter your default wavlink login password to get access to the wifi.wavlink.com setup wizard.
- After that, you will reach the web configuration portal of the Wavlink router.
- Now, go to the Wireless section and change the default SSID and password.
- Customize these credentials as per your choice to secure your network.
- Finally, save all the changes, and the Wavlink Router Login finishes.
How to Accomplish the Wavlink Router Setup Step-by-step?
Generally, you can configure the Wavlink wifi router in two ways, either via the wifi.wavlink.com setup wizard and the WavRouter app. Now that you have accessed the Wavlink Router Login panel through its web management panel. So, follow these steps to set up the basic or advanced settings on your router within a few seconds
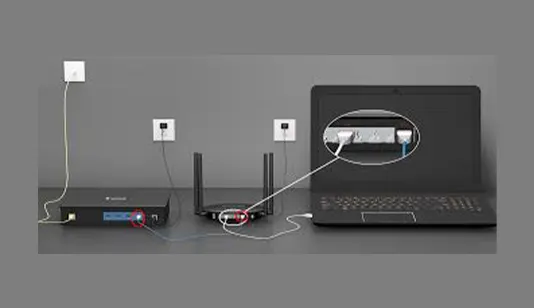
- Primarily, turn off and reboot your existing modem.
- Further, power it on and then connect the LAN port of the modem with the router’s WAN port via Ethernet cables.
- Next, connect your computer to the Wavlink router’s network either via wifi or wired network.
- Further, log in to the wifi.wavlink.com login panel using your valid admin details.
- Next, you will reach the Wavlink router setup wizard.
- Hereon, select your preferred WAN connection type and configure the Wireless Settings
- Make sure you configure your device with the WPA2-PSK security mode.
- After that, navigate to the Advanced tab and set up your device settings accordingly.
- Then, complete the Wavlink setup by following the on-screen guidelines.
Essential Steps to Perform the Wavlink Access Point Setup
Most devices have functionalities to operate as a wireless router, or as an access point. You can easily switch to your preferred mode according to the requirements of your home or enterprise network. Similarly, the Wavlink routers can be accessed and configured as an access point. Find the step-by-step instructions for the Wavlink access point setup:
- First, ensure the hardware connections between your router and modem.
- Then, power on the devices and connect your device to the router’s wifi.
- Next, log into your Wavlink router and access its setup wizard.
- From the web configuration panel, tap on “Wizard” and select “LAN Bridge (AP)”.
- Now, the AP Wizard opens, sets the 2.4 GHz or 5GHz network settings, and chooses the preferred security type.
- Then, apply these changes, and now you can connect multiple devices to your access point.
- Finally, reconnect your device to the new wifi SSID you have just created.
wifi.wavlink.com Not Working? Try These Quick Tips!
Occasionally, users get stuck during the Wavlink router setup due to certain unforeseen challenges. These issues may occur due to incorrect router credentials, internet connectivity issues, poor hardware connections, incorrect settings, browser issues, and many more. If your wifi.wavlink.com Not Working, then try these quick troubleshooting tips:
- Most importantly, ensure a stable internet, either using wifi or opting for Ethernet cables.
- Then, make sure all the physical connections are tight and secure.
- Confirm the power sources, like cords, adapter, and outlet, are working fine.
- Next, remove the network interference such as mirrors, microwaves, etc.
- Further, power cycle your devices for a quick restart to wifi.wavlink.com setup.
- Certainly, check the compatibility of your devices and keep your browser latest.
- If wifi.wavlink.com Not Working on your web browser, use another one or clear cookies, cache, and unwanted files.
- Next, confirm the web/IP address and login credentials along with the router’s information before entering it.
- Moreover, temporarily disable the VPN, Firewall, anti-virus software, etc. during the Wavlink setup.
- Carefully configure the router settings and ensure to use the 2.4 GHz network band for your device.
- However, you can opt for the WavRouter app setup if wifi.wavlink.com not working.
- Finally, factory reset your device if you still face this issue.

On the whole, you dived deep into the wifi.wavlink.com setup process and troubleshooting. If you want personalized assistance for the same, drop us a line!
FAQs
How to connect my Wavlink router to wifi?
You can connect the Wavlink router to wifi through Ethernet or the default Wi-Fi. To connect to the default wifi network, use the default SSID and password given on the device label. Otherwise, go to a browser and open wifi.wavlink.com, and use the on-screen setup wizard to set up your Wi-Fi network
What to do if the wifi.wavlink.com setup fails?
If the Wavlink setup fails, make sure there is no broken connector in any of the physical cables. Cross-verify the wavlink login password and web/IP address. Then, power cycle both your modem and your router and then reattempt the setup. Lastly, undertake a factory reset of the router.
How do I update my Wavlink router firmware?
First, access the Wavlink router login page and then go to the Advanced> Firmware Update”. First of all, download a recent version of the firmware on the official Wavlink website. Then, follow the on-screen instructions to complete this process.
How to reset Wavlink router to factory settings?
To factory reset the Wavlink router, press and hold the small pinhole, which is the physical reset button on your Wavlink router. Then, wait 10-15 seconds and release the reset button when the lights flicker.